The software has been designed to present a consistent graphical user interface and so it is worth familiarising yourself with the layout of a typical window before proceeding further:
The main toolbar contains the File menu to create New projects as well as Open and Save existing projects. The View menu accesses various optional,typically diagnostic, windows and the Zoom menu allows you quickly to manipulate the plan or timeline scale and position. The Options menu allows you to configure various application-wide options and the Help menu gains access to this help, software build details and the means to check for any software upgrades.
The application is divided into ten modes which can be selected by clicking on the appropriate tab. See the Quick Start overview for a brief description of each mode and then the Reference section for more details.
The left hand end of this toolbar always carries the New, Open and Save project buttons. The remainder is populated with tools as appropriate to the selected mode.
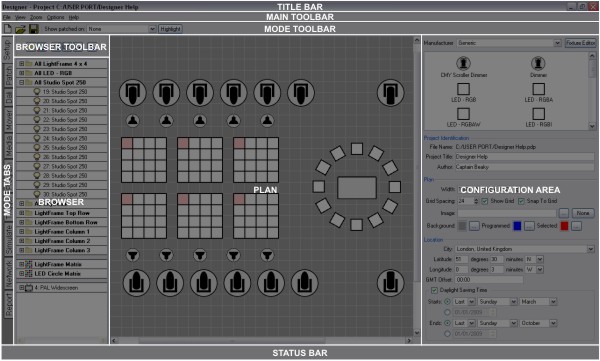
The browser is common to most modes and provides the primary interface for selecting, expanding and grouping fixturesLighting instrument or luminaire. in the project. The rows of the browser provide the seeds for Designer's timeline programming interface. Some modes (Simulate, Network & Reports) have no browser since fixture selection is not relevant. Scroll bars will appear as required and the browser can be made wider by dragging the right hand border.
The Browser toolbar provides controls for expanding and collapsing groupsA collection of fixtures or elements (pixels) within a fixture that provide a very useful shortcut for selecting and programming them together as one. and compound fixturesA lighting fixture containing more than one controllable element, for example an LED batten consisting of a number of identical elements or pixels. as well as for creating groups and Pixel Matrices.
A graphical representation of the installation that provides an interface for selecting fixtures and simulating the results of your programming. This plan simulation is one of Designer's most powerful features as it allows you to program and visually test your programming when off site. Indeed, this feature can be useful in presenting your ideas when bidding for a contract.
Depending on the mode and items selected, context-sensitive configuration or control pane(s) will appear here for fast and convenient editing.
Context-sensitive status and progress is displayed in this area.